Showing posts with label recipes. Show all posts

Monday, June 20, 2016

Happy Father's Day!


Last year for Father's day, we thought it'd be fun to go to a national park for a hike.  You can read about how that fiasco went here, but long story short, we ended up getting lost in the woods without any food or water, hiking up and down cliffs for three hours, and being eaten alive by mosquitoes...This year we decided we'd rather stay home and have a nice quiet dinner with a movie =P.


My dad's favorite foods are cheesecake and caramel, so I mixed the two into one scrumptious dessert...I had planned on making my own caramel like I normally do, but our refrigerator has apparently broken, so all our milk and cream has gone sour =(.  Luckily my mom had some caramel left over from our vacation when we made sundaes, so I just used it instead.


Crust


1 cup graham cracker crumbs
1/4 cup margarine
2 tablespoons granulated sugar


Filling


24 ounces cream cheese, softened
2 tablespoons flour
1 teaspoon vanilla extract
3/4 cup granulated sugar
3 eggs
1/2 cup caramel

Crust

Combine all crust ingredients and press into 9-inch springform pan.  Bake 10 minutes at 325 degrees F. and remove from oven. Turn oven to 450 degrees F.

Filling


  1. Combine softened cream cheese, sugar, flour and vanilla extract, mixing at medium speed until well-blended.
  2. Add eggs one at a time, mixing well after each. Reserve 1 cup of cheese batter; stir 1/2 cup of caramel topping into this reserved cup of batter.
  3. Spoon half of plain batter over crust; cover with the caramel batter, spread remaining plain batter over the caramel layer.
  4. Bake 7 minutes at 450 degrees F, then reduce temperature to 250 degrees F and bake 40 to 45 minutes more.
  5. Remove from oven and loosen cake from rim, but do not remove rim until cool.  If you have any caramel left, you can drizzle some on the top of the cheesecake to make it look a little more fancy ;).

Hope you all had a lovely Father's Day! =)

Sunday, May 8, 2016

Mother's Day Dinner and Chocolate Chip Cheesecake Bites...

I'm actually quite proud of this card ;)

Happy Mother's Day! =)

In my family, we never need much of an excuse to make something special to eat.  All of us love to work in the kitchen and the slightest hint at it being a "special day" will send at least two of us into our favorite room of the house to make some goodies.  This Sunday being Mother's Day, I wanted to try out an idea I had for Chocolate Covered Chocolate Chip Cheesecake Bites.  My family and I could very well live off cheesecake, and my mom loves dark chocolate, so it seemed like a good choice ;).  I couldn't find a recipe anywhere that didn't include a crust or peanut butter (Mom doesn't like peanut butter), so I made one up myself, and surprise, surprise! it actually didn't turn into a giant gooey mess like I expected it too.  In theory, my brother helped me, but in reality he was taking pictures, singing, and sneaking samples...=)

Chocolate Covered Chocolate Chip Cheesecake Bites

Ingredients:

Two 8 oz packages of Cream Cheese

1/2 Cup Sugar

Two Teaspoons Vanilla Extract

11/2 Cups of Chocolate Chips

One Tablespoon shortening

Instructions:

  • Combine cream cheese, sugar, and vanilla in a glass bowl
  • Mix together with hand mixer until smooth and creamy
  • Fold in about half the chocolate chips with spatula
  • Put bowl in refrigerator for thirty minutes
  • Meanwhile, put the remaining chocolate chips with the shortening into a double boiler and slowly heat until completely melted.
  •  Take the cheesecake out of the refrigerator and roll it into small bite sized pieces (if it gets too warm, put it back in the fridge for a little longer)
  • Using a fork, dip cheesecake bites into the chocolate and coat well
  • Place on a tray covered with wax paper (or one of these amazing silpat tray liners) and store in the fridge until you are ready to eat them (it won't be long ;)


Next time I'm going to try to make these with vanilla ice cream instead of cheesecake...if it's not a total disaster I'll share pictures of them too...=)

For dinner, I made a pork tenderloin for mom and I, pork chops for the boys, broccoli with cheese, and my first ever homemade chipotle sauce...


My dad usually buys my mom roses for Mother's Day...this year she got a whole bush ;)


(I need to find this sign for my mom...=))

I hope ya'll had a lovely weekend and a very blessed Mother's Day!

Monday, March 21, 2016

Sweetsome Sundays...Argentinean Ricotta Cake

Happy Palm Sunday everyone!


(This piece looks more flat because it broke in half while my brother was taking a picture and he just kind of squished it back together: the actual cake had a more rounded top)

The recipe for this cake came from a good friend of ours in California (Hi Faby😜!), and I would have made it a while ago if my new spring form pan had not taken over *three* weeks to get here...I'd never even heard of a normal ricotta cake, let alone the Argentinean version, so I was pretty curious to see how it would turn out, and, people, this cake was deeelicious! Imagine blending a cheesecake with doughnuts and then dusting it all with powdered sugar...and it happens to be really simple to make, so double win! We ate half this cake for my brother's feast day on Saturday and then the rest of it on Sunday (I actually ate my piece for breakfast😊); it just keeps getting better the longer you refrigerate it.


Ingredients:

Dough:
  • 2 cups Self Rising Flour (for grain-free version, use 11/4th cup Almond Flour, 1/2 cup Arrowroot Flour, 1/4th cup Coconut Flour, and three tsp Baking Power)
  • 1/2 cup Sugar
  • 10 Tbs Butter
  • 1 Egg plus 1 Egg Yolk
  • 2 Tbs Milk/Cream
Filling:
  • 35 ounces Ricotta Cheese
  • 2 Egg Yolks
  • 3/4 cup Sugar
  • 2 Tbs Milk/Cream
  • Zest from one lemon
  • 1 tsp. Vanilla Extract 

Instructions:

Preheat the oven to 350 degrees Fahrenheit.  Butter a spring-form pan.  Combine the dough ingredients in a food processor and mix till combined.   If it is too dry, you can add a little more cream/milk.  Take half the dough mixture and spread it out over the bottom and up the sides of the spring-form pan to form a sort of bowl, then set aside.  Mix all the filling ingredients together in a glass bowl with a hand mixer (or a fork; it works just as well) until combined.  Pour filling into dough.  Roll out the remaining dough into a circle and use it to cover the rest of the cake, sealing the edges as best you can.  Bake in the oven for 45-60 minutes, until top is golden brown.  Once done, dust the top with powdered sugar and refrigerate before serving.


Have a lovely week!

Sunday, March 13, 2016

Sweetsome Sundays...Paleo Donuts

So who else forgot about the time change? We baaarrreeelllyyy made it to Mass in time, but some of our neighbors didn't get there until after the Gospel...oh, Daylight Savings Time, how we hate thee...=)

We were finally able to have a Sunday all to ourselves, so I didn't work too hard on making a fancy dessert, but I was hungry for donuts and decided to try out a new recipe I had found.  Being myself, I didn't have half of the ingredients, so I improvised...and I'm just going to suggest that if you try out this recipe, you might want to just FOLLOW THE RECIPE and not try to change it like I did...
This recipe came from one of my absolute *favorite* Paleo blogs: primalpalate.com.  If I need a recipe, I always check this blog first.  They used Chocolate Ganache on their donuts, but I'm a Lemon person, so I made a lemon glaze=)...I also cut all the donuts into little bite-sized pieces so there'd be enough for all of us.

Ingredients


Instructions

  1. Preheat the oven to 375 degrees.
  2. In a large mixing bowl, combine the almond flour, arrowroot flour, baking powder, and salt. Stir with a wooden spoon until combined.
  3. In a smaller mixing bowl, add the eggs, pure maple syrup, vanilla extract, and coconut milk. Using a hand mixer, blend ingredients until smooth.
  4. Pour the wet ingredients into the dry, and blend all ingredients with your hand mixer until smooth.
  5. Add your softened coconut oil to the batter, and blend again until all ingredients are combined evenly.
  6. Liberally grease your donut pan with coconut oil, and spoon about a cup of batter into a ziplock bag.
  7. Snip one of the corners off of the ziplock bag, and pipe the batter into the donut mold. More batter makes a fluffy donut, but you will have less total donuts. Filling the molds 3/4 full will yield about 12 donuts.
  8. Smooth the tops of the batter by carefully banging the donut pan on the counter, and smoothing any uneven spots with a spoon or your finger.
  9. Bake the donuts for 12 minutes, making sure to check then after 10 minutes. Remove donuts from oven, and allow to cool on a wire rack.
  10. Grease donut pan again, and repeat for another batch of donuts.
  11. Once donuts are completely cool, dip them into your choice of frosting. It helps to have the frosting in a shallow bowl to dip to donut. Place donuts in the fridge for a few minutes to help the frostings set before serving.
  12. If using the lemon glaze, refrigerate donuts after dipping, then dip a second time, and refrigerate once more to allow the glaze to set.
(To make a lemon glaze, whisk the juice of one lemon with 1/4 cup of powdered sugar until you have a pour-able icing)


Monday, March 7, 2016

Sweetsome Sundays...Paleo Blueberry Pound Cake

Happy Laetare Sunday, everyone!

This Sunday we (once again) had some friends over for dinner and dessert.  Somehow there was some miscommunication about who was providing dinner, because we both did...and we both made roast chicken! It was a good thing, though, because we were all pretty hungry and did the meal full justice =)


For dessert, I made a Paleo Blueberry Pound Cake from AskGeorgie.com...the original recipe had lemon extract in it as well, but I didn't have any so I just skipped it =).  I also found the batter to be too dry, so I added about 1/4 cup of water to it, and baked it for an extra fifteen minutes to make sure it cooked all the way.  This cake disappeared so fast off the platter that I only got one small bite, and that was only because I stole it off my brother's plate.  It was one the most delicious Paleo desserts I have ever made and I will definitely be making more! I think it would be delicious in muffin form as well, so I may try that next time...


Ingredients:

1 cup + 2 tablespoons almond flour
1/4 cup + 2 tablespoons coconut flour
3/4 cup sugar
1/4 teaspoon salt
1-1/2 teaspoons baking powder
1-1/2 teaspoons vanilla extract
3 eggs
1/4 cup + 2 tablespoons water
1-1/2 cups blueberries

Instructions:

1. Preheat oven to 350 degrees F. Butter or oil the inside of a loaf pan.
2. In a large bowl, combine almond and coconut flour, sugar, salt, and baking powder.  Whisk to mix well and break up any lumps.
3. In a second bowl, combine lemon extract, vanilla extract, eggs, and water.  Stir to blend.
4. Add wet ingredients to dry and mix until uniformly moist. Spoon 1/3 of batter into the bottom of the loaf pan. Sprinkle 1/3 of the berries on top. Repeat layers two more times.
5. Bake for 35 minutes. Cool before slicing into 8 slices.

I managed to keep everyone away from the cake long enough to take this one photo...half of it was already eaten by the time I got my phone out =).

If you try this recipe, let me know in the comments how it turns out!

Have a lovely week =)!

Sunday, February 28, 2016

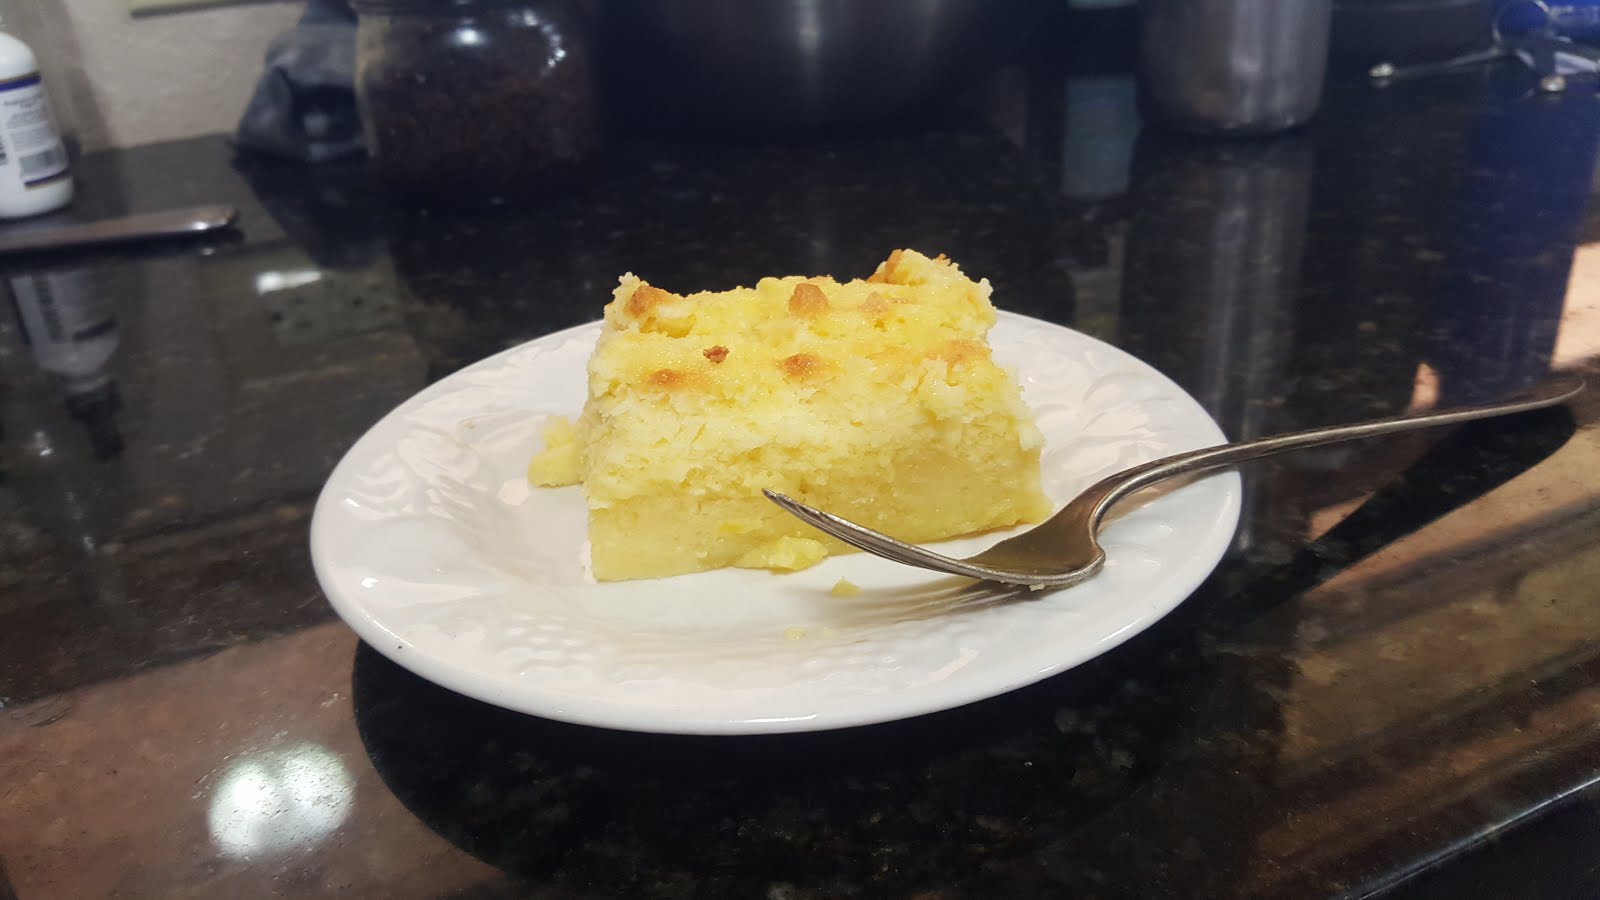
Sweetsome Sundays...Magic Lemon Custard Cake

Happy Sunday, ya'll! =)

Can you believe we're already halfway through Lent?! It seems to go by faster every year...


This week we had some neighbors over for Sunday dinner, so for our dessert I made a Magic Lemon Custard Cake.  I've made plain Magic Custard Cakes before (they're so easy to whip up and taste amazing!), but when I saw a recipe on jocooks.com for a lemon version I had to try it.  I love pretty much anything lemon, and when you mix it into a custard cake it's twice as good =).  For those of you who don't know what a Magic Custard Cake is, it's a cake made from one batter that "magically" separates into three layers while it's baking; a meringue top, a custard middle, and a crust.  I tweaked the original recipe a bit to make it grain-free, but if you don't have a problem with grains, you can just replace the almond and arrowroot flour with all purpose flour.

Grain-Free Magic Lemon Custard Cake

Ingredients

  • 4 eggs (separate yolks from whites) at room temperature
  • 1 tsp vanilla extract
  • 3/4 cup sugar
  • 1 stick or ½ cup butter, melted
  • 1/2 cup Almond flour
  • 1/4 cup Arrowroot flour
  • 1¾ cup cream
  • ¼ cup fresh lemon juice
  • zest from one lemon
  • powdered sugar for dusting cake

Instructions:

  1. Preheat oven to 325 F degrees. Grease a 8 inch x 8 inch baking dish or line it with parchment paper.
  2. Separate eggs and add the egg whites to a mixer and mix until egg whites in a glass bowel until they are stiff, then set aside.
  3. Beat the egg yolks with the sugar until light. Add butter and vanilla extract and continue beating for another minute or two after which you can add the flour and mix it in until fully incorporated.
  4. Add lemon juice and lemon zest then slowly start adding the cream and beat until everything is well mixed together. Add the egg whites, a third at a time and gently fold them in using a spatula or a whisk, repeat until all egg whites are folded in, but there should still be white bits of egg whites floating in the batter.
  5. Pour batter into baking dish and bake for 40 to 70 minutes or until the top is lightly golden and the cake is firm to the touch. The baking time could vary greatly depending on the oven, so take a peek at around 40 minutes and see how it looks.
  6. Sprinkle some powdered sugar on top after cake has cooled.


Notes:

The batter for this cake is very liquid-y, so don't give into the temptation to bake it in a spring-form pan...you'll regret it =).

When you fold in the egg whites, be very careful not to over-mix them; fold until just combined.

I hope you all have a very blessed week! If you try out this recipe be sure to let me know how it turns out in the comments!


Monday, February 15, 2016

Sweetsome Sundays...Chocolate Mocha Frozen Torte

Happy St. Valentine's Day, everyone!!!
I can't believe it's been a year since I last wrote one of these posts...it feels like just yesterday! To be honest, Lent is my favorite time of the year; I love the liturgy, praying the Stations, special Sunday treats, and of course our St. Patrick's Day party! This year it will be a sort of house-warming party for us because it will be the first time we've had friends over in our new house.


This past Sunday we were invited to a friend of mine's home to have dinner with her family...it was a sort of group effort between all of us; I made the main course (lasagna), my friend made a salad, her sister made cookies, my brother Avery provided moral support and comedy to entertain us, and my brother Blaise made a Chocolate Mocha Ice Cream Torte for dessert.  I had asked him to make some simple chocolate chip cookies, but Mr. Gourmet couldn't just make something quick and simple, he had to make something that took two days to put together and looked like something from a William's Sonoma magazine =).  And let me tell you; IT WAS GOOOODDDD...


This is the recipe he used...he made his own macaroons, and some snicker bars instead of the toffee.

Chocolate Mocha Frozen Torte

Ingredients:

  • 1½ cups crisp coconut macaroon cookie crumbs
  • 3 tablespoons butter, melted
  • 4 cups chocolate ice cream, softened
  • 4 cups coffee ice cream, softened
  • 4 ounces chocolate-coated toffee candy bars, coarsely crushed
  • ½ cup hot fudge sauce, cooled*
HOT FUDGE SAUCE
  • 6 ounces unsweetened chocolate
  • 2 cups granulated sugar
  • 4 tablespoons butter
  • 1 cup half and half
  • 1 (14-ounce) can sweetened condensed milk

INSTRUCTIONS

Preheat oven to 350° F. Stir together butter and cookie crumbs. Lightly press into bottom of a 9- to 10-inch springform pan. Bake for 8 minutes or until lightly brown. Cool completely.
Spread chocolate ice cream in an even layer over cooled crust. Drizzle ¼ cup fudge sauce evenly over ice cream. Freeze until firm. Spread coffee ice cream evenly in pan. Sprinkle evenly with crushed toffee and drizzle remaining fudge sauce on top. Cover with plastic film and freeze until firm.
* Use fudge sauce recipe or your favorite brand or recipe
Fudge Sauce
In a saucepan, melt chocolate and butter over low heat, stirring constantly. Add sugar, and half and half. Continue cooking until thickened. Gradually add condensed milk. Cook for 20 minutes, stirring occasionally. Keeps well refrigerated for several months. Reheat before serving. 


Have a lovely week!

Wednesday, January 27, 2016

From the Kitchen...Homemade Sushi


Last Friday we unanimously agreed we wanted some Spicy Sushi like we used to get at Fujiyamas back in Texas.  I know there's a special Japanese name for this dish, but to us it's just Spicy Sushi.
My brother has made basic sushi before with just cream cheese and cucumbers, but I've never tried it so it was a bit of a learning experience for me.  Surprisingly enough, it was very easy and quick to put together! I don't know if I've ever mentioned this before, but I love sushi and could honestly eat it every day, but its so hard to find a good place to buy it without any MSG, and is so expensive...I'm so happy I can make my own now!


Homemade Sushi

Ingredients:


One Sushi grade Tuna Steak, raw, cut into long strips or one inch chunks

Three Sheets of Sushi Nori

Three cups Sushi Rice

One Avocado, diced

Eight ounces of Cream Cheese, cut into long strips

Sesame seeds for garnish


Tiger Sauce:

One cup of Mayonnaise

One tablespoon of Sriracha sauce (or more to taste)

Instructions:

  1. Lay the nori out on a cutting board or other hard, non-sticky surface.  
  2. Cover with rice, pressing down and smoothing it all over the nori.  When completely covered, carefully turn over. 
  3.  Put one strip of cream cheese at the edge.  
  4. Lay the tuna and avocado next to the cream cheese and carefully start rolling the nori (it helps to have your hands wet for this part so the rice doesn't stick to you).  
  5. When it's rolled into a log, wet a knife and start cutting it into one inch circles.  Place the circles standing up on a platter.  Repeat until you've used up all the ingredients.  
  6. In a bowel, mix the mayonnaise and sriracha together until you've reached the level of spice you want.  Drizzle over the sushi and garnish with sesame seeds.  Serve with soy sauce, Tamari, or coconut aminos.


(You really do have to garnish the sushi with something-sesame seeds, parsley, shrimp, avocado; it just makes it look fantastic!)


Tuesday, March 31, 2015

Overnight Trip and Sweetsome Sundays...


For most people, an overnight trip to a town four hours away for a garden convention isn't much to get excited about.  For me, it's a sign of how far I've come since I was diagnosed with chronic fatigue syndrome, mercury poisoning, Hashimotos, and adrenal fatigue.  Three years ago, even last year, a trip like this would have been a MAJOR stress starting  three weeks in advance, with much misery and doubt about whether or not I could handle everything.  Now, even without getting a good night's rest at all last week, having to run and hide from a tornado in a freezing, moldy, and spooky basement, and having to watch The Ten Commandments (have I ever expressed my loathing of anything connected with Charlton Heston? Let's just say this was a perfect lenten penance...), I am tolerably confident I will survive this trip.  Especially since Mom brought bubble gum.


The convention was actually kind of fun; I ran the checkout station (I always feel like Fitz from Agents of Shield when I use our tablet) and got to meet a lot of people, many of whom have been customers of ours for years.  It was lovely hearing about their gardens and answering their questions...actually my brother answered most of the questions, he's much more informed about these things than I am =).


Since we drove, I was able to get caught up on lots of reading and research I've been meaning to do, switching back in forth from book to phone as I gained and lost Internet connection.  I've been interested in making my own makeup for awhile and needed to plan out our Easter dinner (especially since our parish priest may be coming), so all the time stuck in the back of the suburban (I''m now officially the shortest person in the family, so I get the seat with the least amount of leg-room; in other words I had to sit on my feet the whole way =)) was put to good use.  Conveniently enough, there was a Whole Foods and a Natural Grocers right down the road from our hotel and we were able to have a nice salmon and shrimp dinner in our room Friday night.


We were all pretty exhausted when we got home but everyone had a great time and the high speed internet at the convention definitely came in handy.  Mom has had some health summit talks that we've needed to download for a few weeks and my brothers downloaded all the Agents of Shield episodes we have missed during Lent so we can watch them after Easter.  My little brother was in near ecstasy when we got home and found his drone had come in the mail while we were gone...he's been waiting for it to come in for over a month now.  Our doberman is about to have a nervous breakdown from being chased around the house, and the chickens think it's a chicken hawk, but it's already provided a lot of entertainment and fun.   Now that we're back home we're busy preparing our garden for planting and working on finishing up our Lent well.  Last year I did NOT prepare for our Easter dinner, and it wasn't a very festive meal, but this year things are going to be different.  We shall feast on artichoke stuffed lamb, marmalade glazed ham, mashed potatoes, asparagus, and Creme Brulee...so let it be written, so let it be done! (Booonnnnngggg...I love saying that quote; all I need is someone to hit a gong when I say it).

We found all of our flowers have started blooming in our yard...somehow they always seem to bloom right before Easter...


Lately we have been just picking up ice cream for our "Sunday Treat", so I'm going to share the recipe for the cake my brother made for the feast of St. Benedict.  There was some mis-communication about the sweetener, so ours ended up tasting like incredibly buttery cornbread with cream cheese icing...but oh my goodness, it was soooooo delicious.  I just might have him always make it without the sugar...
I got this recipe from Satisfying Eats.


Italian Cream Cake

Cake
3 cups blanched almond flour
2 tsp. baking soda
1 tbsp. plus 1 tsp. baking powder
1/4 tsp. salt
2 tsp. Organic Trader Joe's Stevia or sweetener of choice, to taste
1-1/2 cups of unsweetened shredded coconut**
2 tbsp. pure vanilla extract (or homemade)
8 large eggs
3/4 cup unsalted butter or ghee, melted
1 cup sour cream, heavy cream or pure coconut milk
2 cups chopped pecans

**I used shredded coconut which is very fine for one cake. I also used coconut flakes or coconut chips that I had slightly processed in a food processor to make them smaller, more like shredded coconut, for the second test batch. Both worked well. 

Cream Cheese Frosting
(2) 8-oz. packages cream cheese, softened
1/2 tbsp. pure vanilla extract
1-1/2 cups heavy whipping cream
1/2 tsp. Organic Trader Joe's Stevia or sweetener of choice, to taste
1 tbsp. raw honey (optional)

instructions

Cake

Preheat oven to 350 degrees F. Line the bottom of (2) 8-inch round cake pans with parchment paper to prevent cake from sticking.

In a large bowl, add the dry ingredients. Blend well with a whisk to break up any lumps. To the same bowl, add the remaining ingredients and stir. Taste for sweetness and adjust if needed.

Divide batter between the two lined pans, being sure to spread the batter evenly. Bake for about 30 minutes or until toothpick inserted in the center comes out clean.

Once cakes are done, let cool in pans 5 minutes and then run a butter knife along the edge of the cake and invert onto a cooling rack. Allow cake to completely cool. While cake is cooling, prepare frosting.

Cream Cheese Frosting

In a large bowl, blend cream cheese until smooth using a hand mixer. Add the remaining ingredients and blend until frosting is thick and smooth. Taste for sweetness and adjust if needed.
Frost cooled cake with frosting.

notes
Nutrition: 333 Calories, 31 grams Fat, 7.1 Total Carbs, 2.7 grams Fiber, 4.4 Net Carbs, 7 grams Protein 

 I hope you all have a very Blessed Holy Week and Easter! On Good Friday I'm going to try a new Hot Cross Buns recipe I made up, and if I have time I'll post the recipe and some pictures for your benefit.  If it turns out edible, of course. =)

Sunday, March 22, 2015

Happy Saint Patrick's Day!

This is the week everyone in our community looks forward to during Lent.  A sort of break in the rigorous fasting and abstinence, you might say.  First there's St. Patrick's day, then St. Joseph's, St. Benedict's, and finally the feast of the Annunciation; all very big feasts for us.  I've been rather busy for the past few days planning our annual St. Patrick's Day Party so I was unable to publish my usual "Sweetsome Sundays" post. Instead, here are some pictures from the party, and a recipe for the delicious corned beef my mom made...


I decorated the house with sparkly shamrocks and green and white tulle the day before and put together a couple of apple pies ( this was slightly impromptu...our cooler started freezing everything inside last Sunday, so we had an excess of green apples that needed to be used up as quickly as possible =)) so they'd be ready to put in the oven on the day of the party.  The apple slices were slightly mushy, but it worked great for the pie and no one knew the difference.


We FINALLY got our very own St Patrick statue...


The day of the party we got up early to go to low Mass at the Abbey...when we got back home we started baking, cleaning, touching up the decorations, and making guacamole.


Everyone brought a dessert and a side dish...there was so much food one of the little boys just stood staring at the table with his mouth open for several minutes.


We had a rather diverse age range of youth attending-from one years old to twenty-three, and everyone was able to mingle and have fun together.


Of course the punch was very popular...


After dinner we all headed outside to jump on the trampoline and play Frisbee.  Some of the dads even joined in and we played until it was too dark to see the frisbees anymore.  Then me and some friends went to the barn for an incredibly competitive game of pool...those not playing separated into teams and cheered the players on.  Everyone said they had a wonderful time and the younger kids all wanted to know if we could do it again next week.  There were several injuries sustained by one of the younger boys including a bloody nose, several whacks on the head from the frisbee, a sore neck from being throttled by his brother during a wrestling match, a burn on his hand from sliding across the trampoline, and several bruises from two other boys falling on top of him, but he was a real champ about it and was reasonably consoled by a bowl of ice cream. =)

Corned Beef

We bought our meat ready to cook from Whole Foods...I found instructions online for starting at the very beginning of the process, but it was way to complicated for me to do in the amount of time I had. =)

You Will Need:

A cast iron pot with a lid

Filtered water

Ready to cook Corned Beef

Preheat oven to 275 Fahrenheit.  Place meat in cast iron pot and put in oven.  Cook for six hours.  When done, remove and slice.  The meat may look under cooked, but trust me, it's done.  This is delicious right out of the oven, or cold the next day.  Enjoy!

How Was Your St. Patrick's Day?